2. Orthorectifying CORONA Satellite Imagery#
This lab involves the georeferencing and orthorectification of CORONA satellite imagery.
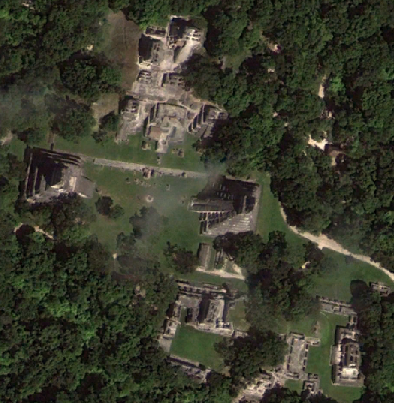
Corona Atlas#
The Corona Atlas project has georeferenced and orthorectified some CORONA imagery. This project has developed an interface called Sunspot for automatic image correction, by invitation only.
USGS Earth Explorer#
Uncorrected CORONA imagery is available through the USGS Earth Explorer. To access imagery, create a free account, and select a location on the map. Click Data Sets and choose the Declassified Data options. Click Results. Only some imagery is available for download, while the rest have not been scanned digitally. Download the imagery by clicking the Download Options button and refer to the metadata under Show Metadata and Browse.
Stitching Imagery#
CORONA imagery will typically be downloaded as a zipped folder usually with four image files. These files can be stitched prior to loading them into QGIS.
The best software for stitching is Adobe Photoshop, available through the Graphics Application interface in UFApps. Download the files, unzip the folder, and then upload the images to your M Drive. Open Adobe Photoshop. Go to File -> Automate -> Photomerge. Browse to load the files and click OK (use the Automatic settings). Once complete, the panorama will load with each image as a separate layer. Go to Layer -> Flatten Image, then File -> Save As, and save as a new tiff file in the M Drive. If using the web browser version of UFApps, use the file transfer option to download the file by opening the M Drive alongside the file transfer window. Copy the file by selecting it in the M Drive, and the download should start.
Very large files cannot be downloaded from the web browser version of UFApps. Instead, open the panorama file in QGIS in the Regular Application interface of UFApps.
Alternatively, download the desktop client with the following instructions. Then follow this link to open the Horizon client, this link to grant file access between your computer and the virtual desktop, and this link to transfer files. You may need to restart or wait for the changes to be made.
You can also use an external drive to transfer files. You will need to change the settings in the Horizon Client to recognize external drives at startup and when connected. The external drive will only be recognized by the Horizon Client when it is not recognized by your local computer. Eject the external drive from your local computer, but leave the drive connected. It should then connect to your Horizon Client virtual desktop. Once connected, in the virtual desktop, click on the arrow at bottom right to open the Safely Remove Hardware and Eject Media button. Click this button, but do not eject the drive. The information should list the name of the drive (D: for example). Open the File Explorer or M Drive in the virtual desktop. You will not see the external drive in the file explorer, but if you type D:\ in the address bar and press Enter, you will navigate to your external drive. Drag files from your M: Drive to the D: Drive. The file transfer will be very slow.
Hugin is a free program that can also be used to stitch the CORONA imagery into a single transect. Load images in order (I have had best results with lens type: Orthographic). If the Camera and Lens window pops up, click Cancel if you do not have the metadata. You may get the option to mask out portions of the photo (optional). Then, Align images, and if successful, Create panorama. Stitching in Hugin can fail, unfortunately, especially when using a Mac.
Check the panorama carefully for any errors. If necessary, stitch the imagery with different parameters.
If you do not have access to Adobe Photoshop, and Hugin does not work, you can still use the images in QGIS, but you will have to georeference each image individually.
QGIS#
Add the individual images or the stitched panorama to QGIS under Layer -> Add Layer -> Add Raster Layer. Next to Raster dataset(s), click the ellipsis, and navigate to the appropriate file(s).
Copy the metadata from USGS Earth Explorer (you will have to click the Show Metadata and Browse button next to the Download Options button) into Google Earth Pro. Make sure under Tools -> Options, the units are set to Degrees, Minutes, Seconds. Add a Placemark and copy the coordinates from the Metadata into Latitude and Longitude. Click OK. Do this for the Center, NW Corner, NE Corner, SE Corner, and SW Corner. Then in Tools -> Options, change the units to Decimal Degrees. Right-click the placemarks and copy the Latitude and Longitude in decimal degrees to a .csv file (using Excel, for example) in the following format:
Point |
Latitude |
Longitude |
|---|---|---|
Center |
Decimal Degrees |
Decimal Degrees |
NW Corner |
Decimal Degrees |
Decimal Degrees |
NE Corner |
Decimal Degrees |
Decimal Degrees |
SE Corner |
Decimal Degrees |
Decimal Degrees |
SW Corner |
Decimal Degrees |
Decimal Degrees |
To add the .csv file with coordinates to QGIS, create a new project (Project -> New). Under File -> Project Properties, set a coordinate system. WGS 84 (EPSG:4326) is appropriate. Use the Add Delimited Text Layer option under Layer -> Add Layer. Under Geometry Definition -> Geometry CRS, select the same coordinate system. Then click Add.
To view a basemap, under Plugins -> Manage and Install Plugins, search for QuickMapServices. Select it, and click Install Plugin. Under Web -> QuickMapServices -> Settings, click More Services, then Get contributed pack. Under Web -> QuickMapServices, select the basemap, for example, Google Satellite. If this menu is not available, try restarting QGIS.
You might run into an error if running QGIS in UFApps. An alternate option for basemaps is to right-click XYZ Tiles in the Browser in QGIS, select New Connection and paste the following URL:
https://www.google.cn/maps/vt?lyrs=s@189&gl=cn&x={x}&y={y}&z={z}
To georeference the imagery, refer to the Georeferencer for instructions. The Georeferencer is available under Layer -> Georeferencer. You will want to identify landmarks in the Corona imagery that are still visible in the basemap. Click Open Raster and select the Corona image. Use the Add GCP point, then click a landmark in the Corona image (Georeferencer window), click From Map Canvas, then click the same point in the Google basemap. The Link Georeferencer to QGIS button will update the Georeferencer based on ground control points (GCPs).
When ready, after adding at least 10 ground control points, click the play button (Start georeferencing). A window will prompt you to select a location to save and a transformation method (select Thin Plate Spline). The resampling method can be set to Nearest Neighbor or Cubic. Click OK and press the play button again.
The result will be added to the map. Check the alignment, and if necessary, you can add additional ground control points as long as you do not close the Georeferencer.
ArcGIS Pro#
The procedure is similar in ArcGIS Pro. Add the resulting panorama to an ArcGIS Pro map using the Add Data button.
Make sure your ArcGIS Pro map is in the appropriate coordinate system for decimal degrees, add the .csv file, and use the XY Table to Point tool to add the coordinates to the map.
Refer to the Georeferencing tools in ArcGIS Pro. Using the Imagery basemap or Google Earth Pro, identify at least 10 control points to georeference the CORONA imagery. Use the Spline transformation for higher accuracy.
Limitations#
This procedure is simplified and uses a “rubber sheet” method that stretches imagery two dimensionally, generating a relatively accurate georeferenced image. However, this method does not take into account topography (three dimensional orthorectification). Using an SRTM elevation raster for georeferencing can improve results. Refer to the many publications by Casana and colleagues for more complex approaches.
Readings#
Casana, J., D. Goodman, and C. Ferwerda. 2023. A wall or a road? A remote sensing-based investigation of fortifications on Rome’s eastern frontier. Antiquity, 1-18. https://doi.org/10.15184/aqy.2023.153
Casana, Jesse. 2020. Global-Scale Archaeological Prospection Using CORONA Satellite Imagery: Automated, Crowd-Sourced, and Expert-led Approaches. Journal of Field Archaeology 45. https://doi.org/10.1080/00934690.2020.1713285
Lindsay, Ian and Arshaluys Mkrtchyan. 2023. Free and Low-Cost Aerial Remote Sensing in Archaeology: An Overview of Data Sources and Recent Applications in the South Caucasus. Advances in Archaeological Practice 11(2):164-183. https://doi.org/10.1017/aap.2023.3
Additional References#
Casana, Jesse. 2014. New Approaches to Spatial Archaeometry: Applications from the Near East. Near Eastern Archaeology 77(3):171-175. JSTOR
Casana, Jesse and Jackson Cothren. 2013. The CORONA Atlas Project: Orthorectification of CORONA Satellite Imagery and Regional-Scale Archaeological Exploration in the Near East. In A Primer on Space Archaeology: In Observance of the 40th Anniversary of the World Heritage Convention. SpringerBriefs in Archaeology 5. PDF
Casana, Jesse, Jackson Cothren, and Tuna Kalayci. 2012. Swords into Ploughshares: Archaeological Applications of CORONA Satellite Imagery in the Near East. Internet Archaeology 32. https://doi.org/10.11141/ia.32.2
Zhang, Yixin, Ningyuan Wang, Jie He, Tao Zhang, Xin Zhang, and Hongpeng Luo. 2024. A Convenient Archaeological Ruins Identification Method through Elevation Information Extraction from CORONA Stereo Pairs. Heritage Science 12:322. https://www.nature.com/articles/s40494-024-01427-7